Pages

Wednesday, December 30, 2009

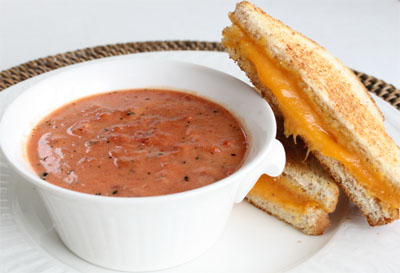
Tomato Basil Soup

It is snowing still. The storm (why are snow falls called storms? It always seems so gentle and peaceful and romantic) began yesterday morning and is still sleepily covering the world with a sweet excuse to curl up with some nice comfort food and family.

It comes from a restaurant in TX called La Madeleine.

La Madeleine Tomato-Basil Soup

Ingredients

4 cups tomatoes, peeled, cored and chopped, or 4 cups canned whole tomatoes, crushed
4 cups tomato juice
12 - 14 washed fresh basil leaves, plus additional for garnish, chopped (or 1 TBSP dried)
1 cup whipping cream (or half and half)
1/2 cup sweet, unsalted butter, softened
Salt to taste
1/4 teaspoon cracked black pepper
Crusty bread (optional)

Directions

Combine tomatoes and juice in saucepan. Simmer for 30 minutes over
medium-low heat. Cool slightly, then place in a blender or food
processor. Add basil and process to puree; this will have to be done in
batches.

Return mixture to saucepan. Add cream and butter. Stir over low heat
until butter and cream are incorporated. Stir in salt and pepper before
serving. Garnish with more fresh basil and serve with fresh, crusty
bread. Makes 8 servings.

Per serving: Cal 237 Fat 22g Fiber 1g Chol. 67 mg Sodium 165 mg Carbs 10g Calcium 45g

Recipe by: La Madeleine French Bakery & Cafe, Dallas TX

Buen Provecho!

Mexican Rice

On Sunday I gave a lesson on time management. I used rice and water as part of my object lesson then realized I had a ton left over. Not wanting to waste it, I took it home and cooked it. Needless to say, cooking with rice has been on my mind quite a bit lately.

Yesterday I found a recipe and used it as a guide for dinner. I was worried it wouldn't be very good, but it was actually delicious!

What You Need:

4 cups cooked brown rice
1 can black beans drained
1 can tomato sauce
1 can diced tomatoes drained
1 packet taco seasoning
2 cups cheese
spinach leaves

What to Do:

Preheat oven to 350*.
Spread rice in a casserole dish. Mix in seasoning, tomatoes, sauce, beans and 1 cup cheese. Sprinkle the rest of the cheese on top.
Bake until cheese is melted and all is heated through- about 20 minutes.
Serve on bed of spinach.

This would also make a great burrito stuffer. I think we are going to try that out tonight... or enchilada! That would be yummy too. At any rate, enjoy, and

Buen Provecho!

Monday, December 21, 2009

Yiddish Food

I am so excited to try this recipe! It is in the oven as we speak and I can't wait to try it. In honor of Hanukkah, I had to try this traditional Jewish dish. I hear this is something that is served for Hanukkah and since I love trying new things, I thought I would give this a go.

Cheese Blintz Casserole

What You need:
16 oz. cottage cheese
16 oz. cream cheese
4 beaten eggs
1 1/2 cups sugar
1 cup flour
2 sticks butter, melted
1/4 cup milk
1 tsp vanilla extract
3 tsp. baking powder
pinch salt
juice of 1 lemon

What to do:
1.) Preheat oven to 350. Grease a 9 x 13 Pyrex.


2.) Mix the filling in 1 bowl: cream the cream cheese & cottage cheese. Add 2 eggs, 1 cup of the sugar, salt, and lemon juice.


3.) In ANOTHER bowl, mix the batter: butter, 1/2 cup of the sugar, 2 eggs, flour, baking powder, milk, & vanilla.


4.) Pour 1/4 of the batter in, then all of the filling. Top with remaining batter.


5.) Bake for 45-60 minutes. Top should be slightly browned.

You can serve this with fruit on top, or sour cream or even applesauce. Use your imagination! Enjoy!

Buen Provecho!

Friday, December 4, 2009

Boston Clam Chowder

I cannot believe I didn't have the recipe for this posted! And clam chowder is one of my all time favorite foods. Tsk, tsk. I came to this blog looking for my recipe, and was very annoyed and shocked when I realized I had not posted it! And since I am no longer pregnant, I no longer have any excuse for not. Therefore, I decided it was time to repent and fix the problem.

I am not a seafood person. In fact, I really hate seafood. Disgusting. But I think that is because I live inland and so none of the seafood is actually fresh, and so it smells and tastes really bad. However, I have always loved clam chowder. Not the clams so much (they just seem to be living rubber bands when you chew them. Have you ever chewed on a rubber band? I used to when I was in elementary school. I still remember the awkward texture.) but everything else about the soup was just heavenly! I would always eat way more than I should, and I enjoyed it every single time. Scrumptious!

When I got married I didn't think I would be making it very often as I am not a milk fan. I mean I drink milk when I have oreos or brownies, and I eat it with my cereal, but that is about the extent of my milk consumption. That being said, I didn't think I would ever buy enough milk to make this soup. But guess what, I did last week. And so, not wanting the milk to go bad, I made clam chowder!

What You Need:
1 C onion finely chopped

1 C finely diced celery

2 C finely diced potatoes
2 cans (6 ½ oz) undrained clams
¾ C butter

¾ C flour
3 quarts milk

1 ½ tsp salt
¼ tsp pepper


What To Do:

In a large frying pan drain clams onto vegetables, and add enough water until vegetables are barely covered. Cook until tender. In a large pot, stir flour and butter until bubbly. Remove from heat and add cream, mixing until smooth. Add milk. Return to heat to cook. Stir constantly until thick and smooth. As it is a milk base, it tends to burn easily. Constant stirring will prevent that. When it reaches your desired consistency, add vegetables and juices as well as salt and pepper, seasoning to taste.

This is delicious with a bread bowl, or even just a grilled cheese sandwich. Best if eaten on a cold winter day. Or in the fall. Or when there is a slight chill in the air in the Spring. Ooh, it is also delicious on a summer night. Whenever you decide to eat it

Buen Provecho!

Butternut Squash Lasagna

Jeffrey simply adores Italian foods. If he could have married pasta, I think he would have. He really does have a love affair with carbs, though. If I cook lots of veggies for dinner, he will eat them, say he is full, and be back 20 minutes later for a sandwich because he has to have carbs to feel full.
So I try to make lots of Italian foods for him. Lasagna is one of his favorites, but finding a good vegetarian lasagna recipe is quite difficult. So we just don't eat lasagna often.

Until now.

I just found the most divine butternut squash lasagna recipe ever! We both absolutely loved it and I want to make it often. But you can't go into it expecting it to taste just like lasagna. For starters there are no tomatoes in it at all, so the marinara sauce taste wont be there. But as I was eating it I felt really good. Not heavy like I generally do after eating Italian. So, I hope you enjoy it, as it has become one of my faaaaaaavorite recipes.


Butternut Squash Lasagna

What You Need:

2 medium butternut squashes
1 onion, chopped fine
1 1/2 cups apple cider
1/2 t. white pepper
3/4 t. ground sage
1 t. sea salt
1/4 t. grated nutmeg
3 cups ricotta cheese or cottage cheese*
1 egg
1 1/2 cups grated Parmesano-Reggiano
8 oz. fresh mozzarella, break up with your hands or grate
1 clove of garlic, minced
1 package of no-boil lasagna noodles
1/2 cup hazelnuts, toasted and chopped
olive oil

What To Do:

Preheat the oven to 400*. Slice your butternut squash in half, scoop out the seeds and place cut side down on a oiled baking sheet. Alternately you can cook the squash in the microwave if you short on time (just microwave cut side down until tender). Roast the squash for 1 hour. When cool enough to handle scoop out the flesh into a large bowl.

While the squash is cooking, heat a skillet and then add a drizzle of olive oil. Cook the onion until beginning to brown, when the onion softens add the minced garlic. Add the cider to the skillet and scrape up the browned bits in the pan. Add to bowl that the squash has an appointment with as well. Add the white pepper, sage and sea salt. Mash it all up with the squash (just like potatoes). It should have a easily-spreadable consistency- think really soft mashed potatoes. If you need additional liquid add a bit of water.

Get your 9x13 baking dish and place all of the noodles inside. Cover with hot tap water and let sit while you prepare the rest (at least 5 minutes). This guarantees only perfect, non-crunchy noodles.

In a separate bowl mix the ricotta cheese, egg, 1 cup of the Parmesan, and nutmeg.

Adjust the oven temperature to 375*. Spread a thin layer of the squash mix. Place four noodles down, slightly overlapping each other. Layer squash, cheese mix and then some fresh mozzarella, noodles and repeat. End the final layer: squash, noodles, cheese mix, mozzarella and the remaining Parmesan.

Bake until golden brown, about 30 minutes. Serve with toasted hazelnuts sprinkled over the top.

*If you are unable to procure ricotta cheese or just need to use up what is already in the fridge go for the cottage cheese; but (and this is important to fool the naysayers and get a better end product) pulse the cottage cheese with a hand blender, in a blender or a food processor until it looks just like ricotta. Ta-da.


Just a few notes, I accidently bought acorn squash instead of the butternut, but it still was great. I imagine you can use virtually any type of winter squash with great results. Also, I used a colby jack cheese because that is what I had on hand.

It is absolutely divine, and I am sure you will love it. Just give it a try!

Buen Provecho!

Wednesday, November 11, 2009

Tuesday, November 10, 2009

Moon Rolls


I found these delicious rolls and am going to make them all the time, they are that great! For Keith's convenience we call them Moon Rolls, and he is eating his fourth or fifth one today. Which is always a good sign. They are super easy to make, and taste fabulous!

What You Need:

2 c. warm water, 110-115°
2 Tbsp. rapid rise yeast (aka bread machine yeast)
1/2 c. oil
1/2 c. powdered milk
1/2 c. sugar
2 eggs
2 tsp. salt
5-6 c. bread flour
Softened butter

What To Do:

Pour water in a bowl and sprinkle yeast over the top. Allow to soften about 5 minutes. Add remaining ingredients and mix well. Dough will be a little sticky, but if it's really sticky add a little more flour. Allow to rise in bowl for 45 minutes. Punch down and allow to rise for another 45 minutes. Break into two equal pieces. On a floured surface, roll out each chunk into a large circle. Spread softened butter (not melted) onto entire circle. Cut into wedges with pizza cutter. (I do 12 for smaller rolls, or 8 for larger.) Starting with wide end of triangles, roll up like a crescent roll. Place on cookie sheets with pointed end tucked underneath (so it doesn’t pop open during baking) and bake at 400° for 10-14 minutes, or until just golden on top.

When we pulled them out of the oven we told Keith they were too hot to eat. So the little genius that he is found a hot pad, and pulled a roll off the pan and ate it out of the hot pad. I wished I had my camera there. It was hilarious! Also, while making these rolls I made a huge mistake. It was so funny, I had to get a picture of it. This is what happened to my egg.

Moral, never try a new recipe while pregnant.


Thursday, November 5, 2009

Menus again

I have been thinking a lot lately. I have been having a hard time with budgeting. Meaning I make a great budget, I just have a hard time staying in the budget. So, I decided to do something about it. I am back to making a meal plan each week. And with that, a weekly shopping list. I will also be posting links to the recipes I use, or the new recipes in the following week, so look for new recipes each week!

This week's menu:

Wednesday: Turkey roll ups
Thursday: Skinny Enchilada Soup, corn bread
Friday: Pizza, cottage cheese salad
Saturday: Nachos
Sunday: Going to Mom's
Monday: Stew and Grandma's Rolls
Tuesday: Fettecuni Alfredo and Bruschetta

Some of these don't really need explaining *like the pizza, nachos and going to Mom's* but for the other things listed with no link the recipes will be coming as the week moves along.
None of the recipes this week are very in depth because I just don't feel like fixing large or extravagant meals right now. Not to worry, they will come back.


Buen Provecho!

Monday, November 2, 2009

Perfect with Apples

While I haven't actually made this yet, it looked like the best recipe out there. I am pretty excited to try it soon. Jeffrey loves caramel apple dip, and since I prefer to make it from scratch over buying it (always tastes better homemade) I decided I need this recipe. I hope it is as good as it sounds! After I make it I will let you know what I think.

What you need:

2 TBSP butter, cubed
1/2 c packed brown sugar
1/3 cup sweetened condensed milk
1/4 cup light corn syrup
1-1/2 teaspoons water
1/4 teaspoon vanilla extract
Sliced apples

What to do:

In a small saucepan combine the butter, sugar, milk, corn syrup and water. cook and stir it over medium heat until it is smooth. Remove from heat and stir in vanilla. Serve with apples.

Good luck, and if any of you make this before I do, let me know how it goes, and how it tastes. Enjoy!

Here We Come a Wassailing

Interesting that Wassailing is a verb. I guess it is true, you can change anything into a verb or even an adjective. They did it in old English, so it must be doable now days!

Today I got an email from a friend of mine who asked me for my wassail recipe. It was then I realized I don't have it written down anywhere. It is just in my head. So, I decided I need to share it with all, since I am doing a fall menu right now. Nothing says fall like Wassail!

What you need:

1 jug Apple cider
Cinnamon sticks
Whole cloves
Orange slices
Frozen orange juice concentrate

What you do:

Pour cider into a large pan and put on the stove to simmer. Add 3-4 cinnamon sticks and about 1 tsp whole cloves (more or less depending on the strength you want them to have). Add a couple of spoons full of the oj concentrate. Slice up oranges (into circles) and let float in cider. Simmer until warm, or smell permeates through house. I generally let it sit an hour or two simply to let the flavors blend and to get the perfume throughout my house.

None of the measurements are exact, and they don't have to be. Play with it and make it how you like it. Enjoy!
Buen Provecho!

The Seediest

Halloween has come and gone, and now there are leftover pumpkins. I got a lot because the grocery store was giving away all their extras, so we got a few good ones. Pies and soup, here we come! I think I may even be adventerous enough to try and find a pumpkin juice recipe this year!

But first and foremost, what to do with those seeds?

I was reading If You Give a Mom a Moment and found this fantastic recipe. We love it! I don't think I will ever use another. Especially since Jeffrey loves worcestershire sauce. Try it, it is so warm and welcoming in your mouth. I can't think of any other way to explain it.

What you need:
1 1/2 TBSP butter, melted
1/2 tsp salt
1/8 tsp garlic powder
2 tsp Worcestershire sauce
2 c raw whole pumpkin seeds

What to do:

Preheat oven to 275*. Mix together everything but pumpkin seeds. Then coat pumpkin seeds with butter mixture. Coat evenly. Pop it into the oven and bake for about an hour, stirring occasionally. Cool before eating. May result in burned tongue and fingers.

Buen Provecho!


Wednesday, October 7, 2009

Missouri Mud


I had a realization the other day.

I have never made Jeffrey's favorite cookies.

We have been married nearly three years and he still hasn't had me make them for him.

What a horrible wife I am turning out to be!

And so as not to get the Worst Wife of the Year nomination, I decided Keith and I are going to make them.

They are probably the simplest cookie out there even.

You know, the delectable delightful No Bakes!


What you need:

2 c sugar
1/2 c milk
1 tsp vanilla
3c + 2 c quick cooking oats
1 tbsp butter
3 tbsp cocoa
1/2 c crunchy peanut butter

What to do:

Mix sugar, butter, milk and cocoa. Bring to a rolling boil and cook 1 minute. Remove from heat and add remaining ingredients. Add the 3 cups of oats then gradually add more until the right consistency is reached. Drop quickly by teaspoonfuls onto waxed paper.
Cool and enjoy!


Grandma Jeri's Rolls

Every year I have looked forward to Grandma's Thanksgiving dinner for one reason. Her rolls. I loved going over and visiting with her and being with the family, but nothing beat her heavenly soft hot rolls. Nothing. Every year there were never enough because I am not the only one who felt this way. All of my many cousins and aunts and uncles loved them as much as I did. They disappeared faster than her pies did (and her pies are incredible.)

A year or two ago my cousin got many of Grandma's favorite recipes and compiled them into a family cookbook. I am so happy she did, because now, on this fine autumn day, I am going to make Grandma's rolls for dinner tonight. I can't wait to eat them again.

Grandma's Buttermilk Rolls

What you need:

3 cups warm buttermilk
4 1/2 tsp yeast
2 TBSP warm water
1/2 c sugar
1/2 c melted shortening
3 eggs, beaten
1 tsp soda
2 tsp salt
5 cups flour (about)

What to do:

Mix buttermilk, yeast, and water together and let rise for 1 hour until it forms a sponge. Separately cream shortening, sugar and eggs. Sift flour, soda, and salt together. When yeast mixture is ready combine all ingredients together. Let rise for 1 hour then kneed. Put into loaf pans and let rise until double in size. Pull apart into roll size and let rise. Bake at 350 until golden brown.

Delicious! As soon as I can find where my son hid my SD card converter I will post pictures. Until then, make your own and discover a mouth full of memories.


Buen Provecho!

Oatmeal Cookies

Whenever I need to make some cookies and don't want to pour over recipe books, I always go to this. It is my favorite cookie recipe and always gets a standing ovation. You can have it without raisins or chocolate chips, or you can add them, according to prefrence. Either way, they are scrum-didily-umptious!

What you need:

3/4 c soft shortening
1 c brown sugar
1/2 c white sugar
1 egg
1/4 c water
1 tsp vanilla
1 c flour
1 tsp salt
1/2 tsp soda
3 c oatmeal
1/2 tsp cinnamon
1/2 tsp cloves
1/2 tsp allspice
(or you can use just 1/2 heaping tsp allspice instead of all the other spices)

What to do:

Beat wet ingredients together until creamy. Cream in the flour, salt soda and spices. Once that is all mixed slowly add the oatmeal. Bake at 350 for 12-15 minutes. Makes about 5 dozen.

Buen Provecho!

Wednesday, September 30, 2009

Vols-au-Vent

Mandatory parts of the challenge: You must make Michel Richard’s recipe for puff pastry (as seen below), and form at least part of it into vols-au-vent (instructions below).

Optional parts of the challenge: You may make your vols-au-vent large or small, and may fill them with whatever you choose (savory or sweet).

Equipment:
-food processor (will make mixing dough easy, but I imagine this can be done by hand as well)
-rolling pin
-pastry brush
-metal bench scraper (optional, but recommended)
-plastic wrap
-baking sheet
-parchment paper
-silicone baking mat (optional, but recommended)
-set of round cutters (optional, but recommended)
-sharp chef’s knife
-fork
-oven
-cooling rack

Prep Times:
-about 4-5 hours to prepare the puff pastry dough (much of this time is inactive, while you wait for the dough to chill between turns…it can be stretched out over an even longer period of time if that better suits your schedule)
-about 1.5 hours to shape, chill and bake the vols-au-vent after your puff pastry dough is complete

Forming and Baking the Vols-au-Vent

Yield: 1/3 of the puff pastry recipe below will yield about 8-10 1.5” vols-au-vent or 4 4” vols-au-vent

In addition to the equipment listed above, you will need:
-well-chilled puff pastry dough (recipe below)
-egg wash (1 egg or yolk beaten with a small amount of water)
-your filling of choice

Line a baking sheet with parchment and set aside.

Using a knife or metal bench scraper, divided your chilled puff pastry dough into three equal pieces. Work with one piece of the dough, and leave the rest wrapped and chilled. (If you are looking to make more vols-au-vent than the yield stated above, you can roll and cut the remaining two pieces of dough as well…if not, then leave refrigerated for the time being or prepare it for longer-term freezer storage. See the “Tips” section below for more storage info.)

On a lightly floured surface, roll the piece of dough into a rectangle about 1/8 to 1/4-inch (3-6 mm) thick. Transfer it to the baking sheet and refrigerate for about 10 minutes before proceeding with the cutting.

(This assumes you will be using round cutters, but if you do not have them, it is possible to cut square vols-au-vents using a sharp chef’s knife.) For smaller, hors d'oeuvre sized vols-au-vent, use a 1.5” round cutter to cut out 8-10 circles. For larger sized vols-au-vent, fit for a main course or dessert, use a 4” cutter to cut out about 4 circles. Make clean, sharp cuts and try not to twist your cutters back and forth or drag your knife through the dough. Half of these rounds will be for the bases, and the other half will be for the sides. (Save any scrap by stacking—not wadding up—the pieces…they can be re-rolled and used if you need extra dough. If you do need to re-roll scrap to get enough disks, be sure to use any rounds cut from it for the bases, not the ring-shaped sides.)

Using a ¾-inch cutter for small vols-au-vent, or a 2- to 2.5-inch round cutter for large, cut centers from half of the rounds to make rings. These rings will become the sides of the vols-au-vent, while the solid disks will be the bottoms. You can either save the center cut-outs to bake off as little “caps” for you vols-au-vent, or put them in the scrap pile.

DSCN8058

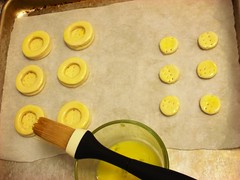
Dock the solid bottom rounds with a fork (prick them lightly, making sure not to go all the way through the pastry) and lightly brush them with egg wash. Place the rings directly on top of the bottom rounds and very lightly press them to adhere. Brush the top rings lightly with egg wash, trying not to drip any down the sides (which may inhibit rise). If you are using the little “caps,” dock and egg wash them as well.
DSCN8060

Refrigerate the assembled vols-au-vent on the lined baking sheet while you pre-heat the oven to 400ºF (200ºC). (You could also cover and refrigerate them for a few hours at this point.)

Once the oven is heated, remove the sheet from the refrigerator and place a silicon baking mat (preferred because of its weight) or another sheet of parchment over top of the shells. This will help them rise evenly. Bake the shells until they have risen and begin to brown, about 10-15 minutes depending on their size. Reduce the oven temperature to 350ºF (180ºC), and remove the silicon mat or parchment sheet from the top of the vols-au-vent. If the centers have risen up inside the vols-au-vent, you can gently press them down. Continue baking (with no sheet on top) until the layers are golden, about 15-20 minutes more. (If you are baking the center “caps” they will likely be finished well ahead of the shells, so keep an eye on them and remove them from the oven when browned.)

Remove to a rack to cool. Cool to room temperature for cold fillings or to warm for hot fillings.

Fill and serve.

*For additional rise on the larger-sized vols-au-vents, you can stack one or two additional ring layers on top of each other (using egg wash to "glue"). This will give higher sides to larger vols-au-vents, but is not advisable for the smaller ones, whose bases may not be large enough to support the extra weight.

*Although they are at their best filled and eaten soon after baking, baked vols-au-vent shells can be stored airtight for a day.

*Shaped, unbaked vols-au-vent can be wrapped and frozen for up to a month (bake from frozen, egg-washing them first).

Michel Richard’s Puff Pastry Dough

From: Baking with Julia by Dorie Greenspan
Yield: 2-1/2 pounds dough

Steph’s note: This recipe makes more than you will need for the quantity of vols-au-vent stated above. While I encourage you to make the full recipe of puff pastry, as extra dough freezes well, you can halve it successfully if you’d rather not have much leftover.

There is a wonderful on-line video from the PBS show “Baking with Julia” that accompanies the book. In it, Michel Richard and Julia Child demonstrate making puff pastry dough (although they go on to use it in other applications). They do seem to give slightly different ingredient measurements verbally than the ones in the book…I listed the recipe as it appears printed in the book. http://video.pbs.org/video/1174110297/search/Pastry

Ingredients:
2-1/2 cups (12.2 oz/ 354 g) unbleached all-purpose flour
1-1/4 cups (5.0 oz/ 142 g) cake flour
1 tbsp. salt (you can cut this by half for a less salty dough or for sweet preparations)
1-1/4 cups (10 fl oz/ 300 ml) ice water
1 pound (16 oz/ 454 g) very cold unsalted butter

plus extra flour for dusting work surface

Mixing the Dough:

Check the capacity of your food processor before you start. If it cannot hold the full quantity of ingredients, make the dough into two batches and combine them.

Put the all-purpose flour, cake flour, and salt in the work bowl of a food processor fitted with a metal blade and pulse a couple of times just to mix. Add the water all at once, pulsing until the dough forms a ball on the blade. The dough will be very moist and pliable and will hold together when squeezed between your fingers. (Actually, it will feel like Play-Doh.)

Remove the dough from the machine, form it into a ball, with a small sharp knife, slash the top in a tic-tac-toe pattern. Wrap the dough in a damp towel and refrigerate for about 5 minutes.

Meanwhile, place the butter between 2 sheets of plastic wrap and beat it with a rolling pin until it flattens into a square that's about 1" thick. Take care that the butter remains cool and firm: if it has softened or become oily, chill it before continuing.

Incorporating the Butter:

Unwrap the dough and place it on a work surface dusted with all-purpose flour (A cool piece of marble is the ideal surface for puff pastry) with your rolling pin (preferably a French rolling pin without handles), press on the dough to flatten it and then roll it into a 10" square. Keep the top and bottom of the dough well floured to prevent sticking and lift the dough and move it around frequently. Starting from the center of the square, roll out over each corner to create a thick center pad with "ears," or flaps.

Place the cold butter in the middle of the dough and fold the ears over the butter, stretching them as needed so that they overlap slightly and encase the butter completely. (If you have to stretch the dough, stretch it from all over; don't just pull the ends) you should now have a package that is 8" square.

To make great puff pastry, it is important to keep the dough cold at all times. There are specified times for chilling the dough, but if your room is warm, or you work slowly, or you find that for no particular reason the butter starts to ooze out of the pastry, cover the dough with plastic wrap and refrigerate it . You can stop at any point in the process and continue at your convenience or when the dough is properly chilled.

Making the Turns:

Gently but firmly press the rolling pin against the top and bottom edges of the square (this will help keep it square). Then, keeping the work surface and the top of the dough well floured to prevent sticking, roll the dough into a rectangle that is three times as long as the square you started with, about 24" (don't worry about the width of the rectangle: if you get the 24", everything else will work itself out.) With this first roll, it is particularly important that the butter be rolled evenly along the length and width of the rectangle; check when you start rolling that the butter is moving along well, and roll a bit harder or more evenly, if necessary, to get a smooth, even dough-butter sandwich (use your arm-strength!).

With a pastry brush, brush off the excess flour from the top of the dough, and fold the rectangle up from the bottom and down from the top in thirds, like a business letter, brushing off the excess flour. You have completed one turn.

Rotate the dough so that the closed fold is to your left, like the spine of a book. Repeat the rolling and folding process, rolling the dough to a length of 24" and then folding it in thirds. This is the second turn.

Chilling the Dough:

If the dough is still cool and no butter is oozing out, you can give the dough another two turns now. If the condition of the dough is iffy, wrap it in plastic wrap and refrigerate it for at least 30 minutes. Each time you refrigerate the dough, mark the number of turns you've completed by indenting the dough with your fingertips. It is best to refrigerate the dough for 30 to 60 minutes between each set of two turns.

The total number of turns needed is six. If you prefer, you can give the dough just four turns now, chill it overnight, and do the last two turns the next day. Puff pastry is extremely flexible in this regard. However, no matter how you arrange your schedule, you should plan to chill the dough for at least an hour before cutting or shaping it.

Steph’s extra tips:

-While this is not included in the original recipe we are using (and I did not do this in my own trials), many puff pastry recipes use a teaspoon or two of white vinegar or lemon juice, added to the ice water, in the détrempe dough. This adds acidity, which relaxes the gluten in the dough by breaking down the proteins, making rolling easier. You are welcome to try this if you wish.

-Keep things cool by using the refrigerator as your friend! If you see any butter starting to leak through the dough during the turning process, rub a little flour on the exposed dough and chill straight away. Although you should certainly chill the dough for 30 to 60 minutes between each set of two turns, if you feel the dough getting to soft or hard to work with at any point, pop in the fridge for a rest.

-Not to sound contradictory, but if you chill your paton longer than the recommended time between turns, the butter can firm up too much. If this seems to be the case, I advise letting it sit at room temperature for 5-10 minutes to give it a chance to soften before proceeding to roll. You don't want the hard butter to separate into chuncks or break through the dough...you want it to roll evenly, in a continuous layer.

-Roll the puff pastry gently but firmly, and don’t roll your pin over the edges, which will prevent them from rising properly. Don't roll your puff thinner than about about 1/8 to 1/4-inch (3-6 mm) thick, or you will not get the rise you are looking for.

-Try to keep “neat” edges and corners during the rolling and turning process, so the layers are properly aligned. Give the edges of the paton a scooch with your rolling pin or a bench scraper to keep straight edges and 90-degree corners.

-Brush off excess flour before turning dough and after rolling.

-Make clean cuts. Don’t drag your knife through the puff or twist your cutters too much, which can inhibit rise.

-When egg washing puff pastry, try not to let extra egg wash drip down the cut edges, which can also inhibit rise.

-Extra puff pastry dough freezes beautifully. It’s best to roll it into a sheet about 1/8 to 1/4-inch thick (similar to store-bought puff) and freeze firm on a lined baking sheet. Then you can easily wrap the sheet in plastic, then foil (and if you have a sealable plastic bag big enough, place the wrapped dough inside) and return to the freezer for up to a few months. Defrost in the refrigerator when ready to use.

-You can also freeze well-wrapped, unbaked cut and shaped puff pastry (i.e., unbaked vols-au-vent shells). Bake from frozen, without thawing first.

-Homemade puff pastry is precious stuff, so save any clean scraps. Stack or overlap them, rather than balling them up, to help keep the integrity of the layers. Then give them a singe “turn” and gently re-roll. Scrap puff can be used for applications where a super-high rise is not necessary (such as palmiers, cheese straws, napoleons, or even the bottom bases for your vols-au-vent).

DSCN8063

You can find lots more general tips for making puff pastry on-line, including here:
http://www.baking911.com/pastry/puff.htm

I encourage everyone to watch the on-line video from the PBS show “Baking with Julia” that accompanies the book:
http://video.pbs.org/video/1174110297/search/Pastry

Here are some photos of the vols-au-vent I made:

canapé-sized with smoked salmon mousse

DSCN8068

larger-size with chilled tuna salad
DSCN8290

sweet with vanilla whipped cream and strawberries
DSCN8207


The Divinity of Plums


Today was perfect. I walked into my kitchen while the rain pelted against the window and had a love affair with the plums. They sat there on my new cake stand, just begging to be made into something delicious. I looked through my cupboards and decided I had all the ingredients to make a scrumptious plum pudding. I can't wait to eat it after dinner! And tomorrow I will probably get started on the apples. The abundance of Fall just has me reeling. Apples, plums, grapes! It is enough to make your mouth dance for joy.


What you need:

12 plums, pitted and halved
1 cup white sugar
1/2 cup water
2 tablespoons tapioca
1/2 teaspoon ground cinnamon
2 1/4 cups all-purpose baking mix
3 tablespoons white sugar
2/3 cup milk
3 tablespoons margarine, melted

What to do:

As always, it works better if you can preheat your oven. For this recipe 350 is the recommended temperature.
In a 2 quart baking dish, stir together plums, 1 cup sugar, water, tapioca and cinnamon. Bake for 25 minutes. While the plum concoction is baking, combine baking mix, sugar, milk and melted butter to form a shortcake dough. Once the plum mixture is through baking, pull it out and drop dough onto it. Put bake in the oven at 380 and bake for 20 minutes, until golden brown. Let it cool a bit before eating or deal with a burned mouth. I can't wait to give it a try. The cinnamon and plum permeated throughout my whole house and is telling me fall and baking season are here!

Buen Provecho!

Monday, September 14, 2009

Vegi and Lentil Stew and Tony Roma's Potato Soup

So today is a perfect day for soup. I love soup. It is just so darn tasty and warms the soul. In honor of the massive rain storm and the lightening that I am so excited to see, I am making soup for dinner tonight. However I can't really decide which type to make, so I am making two. I can freeze the other for a later date, and that will be nice for a day when I don't feel like cooking. To start off I stuck some stuff in the crock pot, and we will see how it turns out. I am sort of making it up as I go. While that is cooking in the crock pot I am going to get started on a favorite around here. It is a rendition of Tony Roma's potato soup. Delicious, and super easy.

The recipe for the Tony Roma's soup is easy, and anyone can make it


Tony Roma's Potato Soup

What You Need:

2 med baked potatoes (bake before hand)
3 tsp butter
1 cups diced white onions (can use less)
2 tsp flour
4 coups veggie broth
2 cups water
1/4 cup cornstarch
1 1/2 cup instant mashed potatoes
1 tsp salt
3/4 tsp pepper
1/2 tsp basil
1/8 tsp thyme
1 cup half-n-half
garnish cheddar cheese and green onions

What To Do:

Melt butter and saute onion until light brown. Add flour to onion and stir to make roux. Add stock, water, cornstarch, mashed potatoes, and spices and bring to boil. Reduce heat and simmer 5 minutes. cut potatoes and scoop out. Discard skins. cut potatoes into 1/2 inch chunks. Add chopped potatoes and half-n-half to saucepan and bring to a boil, reduce and simmer 5 minutes.

The other soup I am making is with a vegi soup mix i bought at the local grocery store. It has green and yellow split peas, barley, lentils and pasta bits made from whole wheat flour, spinach, and tomato. To that mix I am adding some onion, parsnip, zucchini, celery, carrots, and potato. I will also add a bay leaf. It is going to simmer in the crock pot for a couple of hours, and then should be ready for the freezer or to eat! Sweet!

But, for dinner tonight I am serving the Tony Roma's potato soup with my delectable grilled cheese sandwiches. Can't wait for dinner time!


Thursday, August 27, 2009

Dobos Torta

Equipment

  • 2 baking sheets
  • 9” (23cm) springform tin and 8” cake tin, for templates
  • mixing bowls (1 medium, 1 large)
  • a sieve
  • a double boiler (a large saucepan plus a large heat-proof mixing bowl which fits snugly over the top of the pan)
  • a small saucepan
  • a whisk (you could use a balloon whisk for the entire cake, but an electric hand whisk or stand mixer will make life much easier)
  • metal offset spatula
  • sharp knife
  • a 7 1/2” cardboard cake round, or just build cake on the base of a sprinfrom tin.
  • piping bag and tip, optional

Prep times

  • Sponge layers 20 mins prep, 40 mins cooking total if baking each layer individually.
  • Buttercream: 20 mins cooking. Cooling time for buttercream: about 1 hour plus 10 minutes after this to beat and divide.
  • Caramel layer: 10-15 minutes.
  • Assembly of whole cake: 20 minutes

Sponge cake layers

  • 6 large eggs, separated, at room temperature
  • 1 1/3 cups (162g) confectioner's (icing) sugar, divided
  • 1 teaspoon (5ml) vanilla extract
  • 1 cup plus 2 tablespoons (112g) sifted cake flour (SUBSTITUTE 95g plain flour + 17g cornflour (cornstarch) sifted together)
  • pinch of salt

Chocolate Buttercream

  • 4 large eggs, at room temperature
  • 1 cup (200g) caster (ultrafine or superfine white) sugar
  • 4oz (110g) bakers chocolate or your favourite dark chocolate, finely chopped
  • 2 sticks plus 2 tablespoons (250g) unsalted butter, at room temperature.

Caramel topping

  • 1 cup (200g) caster (superfine or ultrafine white) sugar
  • 12 tablespoons (180 ml) water
  • 8 teaspoons (40 ml) lemon juice
  • 1 tablespoon neutral oil (e.g. grapeseed, rice bran, sunflower)

Finishing touches

  • a 7” cardboard round
  • 12 whole hazelnuts, peeled and toasted
  • ½ cup (50g) peeled and finely chopped hazelnuts

Directions for the sponge layers:

NB. The sponge layers can be prepared in advance and stored interleaved with parchment and well-wrapped in the fridge overnight.

1.Position the racks in the top and centre thirds of the oven and heat to 400F (200C).
2.Cut six pieces of parchment paper to fit the baking sheets. Using the bottom of a 9" (23cm) springform tin as a template and a dark pencil or a pen, trace a circle on each of the papers, and turn them over (the circle should be visible from the other side, so that the graphite or ink doesn't touch the cake batter.)
3.Beat the egg yolks, 2/3 cup (81g) of the confectioner's (icing) sugar, and the vanilla in a medium bowl with a mixer on high speed until the mixture is thick, pale yellow and forms a thick ribbon when the beaters are lifted a few inches above the batter, about 3 minutes. (You can do this step with a balloon whisk if you don't have a mixer.)

4.In another bowl, using clean beaters, beat the egg whites until soft peaks form. Gradually beat in the remaining 2/3 cup (81g) of confectioner's (icing)sugar until the whites form stiff, shiny peaks. Using a large rubber spatula, stir about 1/4 of the beaten whites into the egg yolk mixture, then fold in the remainder, leaving a few wisps of white visible. Combine the flour and salt. Sift half the flour over the eggs, and fold in; repeat with the remaining flour.
5.Line one of the baking sheets with a circle-marked paper. Using a small offset spatula, spread about 3/4cup of the batter in an even layer, filling in the traced circle on one baking sheet. Bake on the top rack for 5 minutes, until the cake springs back when pressed gently in the centre and the edges are lightly browned. While this cake bakes, repeat the process on the other baking sheet, placing it on the centre rack. When the first cake is done, move the second cake to the top rack. Invert the first cake onto a flat surface and carefully peel off the paper. Slide the cake layer back onto the paper and let stand until cool. Rinse the baking sheet under cold running water to cool, and dry it before lining with another parchment. Continue with the remaining papers and batter to make a total of six layers. Completely cool the layers. Using an 8" springform pan bottom or plate as a template, trim each cake layer into a neat round. (A small serrated knife is best for this task.)


A baked layer.

Directions for the chocolate buttercream:

NB. This can be prepared in advance and kept chilled until required.

1.Prepare a double-boiler: quarter-fill a large saucepan with water and bring it to a boil.
2.Meanwhile, whisk the eggs with the sugar until pale and thickened, about five minutes. You can use a balloon whisk or electric hand mixer for this.
3.Fit bowl over the boiling water in the saucepan (water should not touch bowl) and lower the heat to a brisk simmer. Cook the egg mixture, whisking constantly, for 2-3 minutes until you see it starting to thicken a bit. Whisk in the finely chopped chocolate and cook, stirring, for a further 2-3 minutes.
4.Scrape the chocolate mixture into a medium bowl and leave to cool to room temperature. It should be quite thick and sticky in consistency.
5.When cool, beat in the soft butter, a small piece (about 2 tablespoons/30g) at a time. An electric hand mixer is great here, but it is possible to beat the butter in with a spatula if it is soft enough. You should end up with a thick, velvety chocolate buttercream. Chill while you make the caramel topping.

Lorraine's note: If you're in Winter just now your butter might not soften enough at room temperature, which leads to lumps forming in the buttercream. Male sure the butter is of a very soft texture I.e. running a knife through it will provide little resistance, before you try to beat it into the chocolate mixture. Also, if you beat the butter in while the chocolate mixture is hot you'll end up with more of a ganache than a buttercream!

Directions for the caramel topping:

1.Choose the best-looking cake layer for the caramel top. To make the caramel topping: Line a jellyroll pan with parchment paper and butter the paper. Place the reserved cake layer on the paper. Score the cake into 12 equal wedges. Lightly oil a thin, sharp knife and an offset metal spatula.
2.Stir the sugar, water and lemon juice in a small saucepan. Bring to a boil over a medium heat, stirring often to dissolve the sugar. Once dissolved into a smooth syrup, turn the heat up to high and boil without stirring, swirling the pan by the handle occasionally and washing down any sugar crystals on the sides of the pan with a wet brush until the syrup has turned into an amber-coloured caramel.
3.The top layer is perhaps the hardest part of the whole cake so make sure you have a oiled, hot offset spatula ready. I also find it helps if the cake layer hasn't just been taken out of the refrigerator. I made mine ahead of time and the cake layer was cold and the toffee set very, very quickly—too quickly for me to spread it. Immediately pour all of the hot caramel over the cake layer. You will have some leftover most probably but more is better than less and you can always make nice toffee pattern using the extra to decorate. Using the offset spatula, quickly spread the caramel evenly to the edge of the cake layer. Let cool until beginning to set, about 30 seconds. Using the tip of the hot oiled knife (keep re-oiling this with a pastry brush between cutting), cut through the scored marks to divide the caramel layer into 12 equal wedges. Cool another minute or so, then use the edge of the knife to completely cut and separate the wedges using one firm slice movement (rather than rocking back and forth which may produce toffee strands). Cool completely.

Angela's note: I recommend cutting, rather than scoring, the cake layer into wedges before covering in caramel (reform them into a round). If you have an 8” silicon round form, then I highly recommend placing the wedges in that for easy removal later and it also ensures that the caramel stays on the cake layer. Once set, use a very sharp knife to separate the wedges.

Assembling the Dobos

1.Divide the buttercream into six equal parts.
2.Place a dab of chocolate buttercream on the middle of a 7 1/2” cardboard round and top with one cake layer. Spread the layer with one part of the chocolate icing. Repeat with 4 more cake layers. Spread the remaining icing on the sides of the cake.
3.Optional: press the finely chopped hazelnuts onto the sides of the cake.
4.Propping a hazelnut under each wedge so that it sits at an angle, arrange the wedges on top of the cake in a spoke pattern. If you have any leftover buttercream, you can pipe rosettes under each hazelnut or a large rosette in the centre of the cake. Refrigerate the cake under a cake dome until the icing is set, about 2 hours. Let slices come to room temperature for the best possible flavour.


Monday, August 17, 2009

Gourmet Grilled Cheese Restaurant Style

It's been a long day. Dinner was not exactly something I was looking forward to making. I wasn't sure what to make, and really didn't want to spend a lot of time in the kitchen. It is hot outside.
So, I did what most people do when confronted with a problem. I gathered up Keith, and went out to play. We stopped by my friend's house and brought her along to a nearby walk-way. As we were walking and talking she mentioned she was going to make grilled cheese and soup for dinner.

See, problem solved! I just needed to go play for a while and the problem would solve itself. Isn't she a great friend? At any rate, as I thought about it, I remembered a grilled cheese sandwich I had once made for Jeffrey. He loved it. So I decided to make it again. It is a restaurant style grilled cheese, and it is a great way to wow people with something simple. I hope you all enjoy it as much as we do!

Gourmet Grilled Cheese Restaurant Style

3/4 cup mayonnaise
1 cup (4 oz.) shredded cheddar cheese
1 cup (4 oz.) shredded mozzarella cheese
1/4 tsp. garlic powder
1/8 tsp. seasoned salt
10 slices Italian bread (1/2" thick)
2 Tbsp. butter or margarine, softened

What To Do:

In mixing bowl, beat cream cheese and mayo until smooth. Stir in cheeses (or just one kind if that is all you have on hand), garlic powder (I always use fresh garlic that is chopped up), and seasoned salt. Spread 5 slices of bread with the cheese mixture, about 1/3 cup on each. Top with remaining bread. Butter the outside of sandwiches; cook in a large skillet over medium heat until golden brown on both sides. The recipe I followed said to not use regular bread due to the filling being very heavy, but since that is what I had on hand, that is what I used and it turned out fine. It suggests using sourdough and spreading the filling thin so you can make more sandwiches, and have it not so rich. Any which way you choose to make this is fine. It's a pretty hard recipe to mess up. Enjoy!

Buen Provecho!


Tuesday, July 7, 2009

Tortellini a la Florentine

Tonight I went through my recipe index and thought I would try a new one. We made a pasta dish that isn't one of my favorites. I don't know if I will make it again. It was good enough, and possibly I didn't like it because i was so hot and the food was hot, and I had to cook it. That right there is enough to ruin any good food. Jeffrey wasn't a huge fan because he had a horrid day at work and that right there is enough to spoil even the best food. He wasn't a fan of the wilted spinach but I liked it. At any rate, here it is...

Tortellini a la Florentine

What You Need:

1 Tbsp Vegetable oil
1/4 cup Chopped onion
1 tsp Chopped fresh garlic
1 can (28 oz) crushed tomatoes in mixed herbs
slat and freshly ground pepper, to taste
1 can (10 3/4 oz) condensed cream of mushroom soup
1 Tbsp Butter
2 Bags fresh baby spinach
3/4- 1lb fresh or frozen cheese tortellini, freshly cooked and drained
1 Tbsp chopped fresh parsley

What To Do:

In a large heavy saucepan, heat the oil over medium heat. Add the onion and garlic and cook, stirring often, until tender. Stir in the tomatoes and salt and pepper to taste; bring to a boil. Lower the heat and let simmer for 10 minutes.
Stir in the cream of mushroom soup and heat slowly. Remove and cover to keep warm.
In a large deep skillet, melt the butter over medium low heat. Add the spinaceh in batches, and cook, tossing until wilted. Season with salt and pepper.
Arrange the spinach and the tortellini on 4 heated plates. Coat with the mushroom sauce and sprinkle with parsley.


Buen Provecho!


Monday, July 6, 2009

Roasted Zucchini Sandwich = Yum!

Incredible! That is all I have to say. Tonight for dinner, I made something that Jeffrey fell in love with.

Last night my mother gave me 5 zucchini (oh the summer and the wonderful game of too much zucchini. The passing of the zucchini from person to person because everyone has way too much. What a great blessing it is) and told me I had to use it up fast because it was already a little old.

I was getting a little tired of my old recipes with zucchini, and let's be honest, my pregnant self can't handle it sauteed or fried at all, so I had to find another way too cook it (and I don't really feel like making zucchini bread) so... I was on the hunt.

And this morning, I found it. The perfect zucchini sandwich recipe ever made. It uses sprouts, tomato, cheese and zucchini which all make me happy (gotta love the veggies) and it has lots of bread, which makes Jeffrey very happy.

For dinner we had a butternut squash soup (which Keith couldn't get enough of... that is all he would eat), the zucchini sandwiches, and I wanted to have salad and watermelon, but Jeffrey said he was too full, and didn't want to cut the melon, so we are saving that for tomorrow.

I gotta say, this sandwich was exquisite (can you say that about a sandwich?)! I can't wait to try it again!

So, without further ado;

The Roasted Zucchini Sandwich

What You Need:

1/4 cup Olive oil
1/2 tsp Thyme
1/4 tsp Garlic powder
Dash salt and pepper
Mayonnaise/Dijon mustard (mixed together to make a sauce)
Alfalfa Sprouts
Fresh garden tomato slices
Smoked Gouda cheese slices

What To Do:

Slice zucchini diagonally into ¼” thick slices. Place on foil lined baking sheet. Brush both sides with a mixture of olive oil and spices including salt and pepper. Bake at 300° for about 12-15 minutes or until zucchini is tender. (Or these can be grilled outside on the barbecue...) Allow to cool to room temperature. On really good, soft bakery rolls, assemble the sandwiches.


Just a note, I was in a hurry when I made these and forgot to brush the zucchini with the olive oil spice mixture and it was still heaven in the mouth. I can only imagine how much better it would be with the mixture brushed over it. I am definitely going to have to try that next time!


Buen Provecho!

Wednesday, July 1, 2009

Berry Crisp

Remember how I was going to make the most perfect dinner ever for Jeffrey? Well, that was before he decided to surprise me with Cafe Rio and a movie, and then playing with Keith on the floor for about 15 minutes of pure laughter. I decided that we really need to up our fruit intake, so made a berry crisp. Now, I sort of made up my own recipe, and it was super runny, so the next time I make it, I may add some more corn starch, or maybe it will cool down and thicken up. We'll see. At any rate, it was delicious, and would taste even better with some cold ice cream. Yummy! Here is my recipe


What You Need:

Filling:
3-4 cups of berries (I used strawberries, blackberries and raspberries)
1 cup water
1/2 cup sugar
1 T cornstarch

Topping
3/4 cup butter (I actually used quite a bit less. You could probably get away with 1/2 cup or so)
1/2 cup granulated sugar
1/2 cup brown sugar
1 1/4 cup flour
1 cup oatmeal

What You Do:

Heat oven to 375*. Hull the strawberries, and set all berries aside.
mix sugar, cornstarch and water in a pan on medium heat, stirring constantly until it becomes clear. Add berries to mixture on stove, and coat them all. In a buttered 8 qt pan pour berry mixture. Set aside. In separate bowl mix sugars and butter until creamy. Slowly add flour. When that is all mixed in, add oatmeal. Once it comes to a crumb like consistency, spread by crumbling over berries. Bake for 25-30 minutes.
I didn't do this when I initially made it, but the next time I make this I will add some cinnamon to the flour mixture, and possibly a little vanilla.
Serve over ice cream. Devour hot or cold, it doesn't matter because it is divine!

Buen Provecho!